The Construction Punch List Process: A Homeowner's Step-by-Step Walkthrough
Step-by-step construction punch list process for homeowners buying new construction. Walkthrough timing, documents to bring, and what to demand from your builder.
By the Real Estate Ledger Team | Last updated: May 2026
Here is the gap that costs new construction buyers the most money: the homeowner punch list walkthrough is the single appointment where you have maximum leverage over your builder, and most buyers spend about 15 minutes on a walk that should take two to three hours. The construction punch list is the formal record of defects and incomplete work that the builder is contractually obligated to correct before final payment changes hands. Treat the walkthrough as a closing-day formality, and you inherit every missed item as a future warranty claim — or an out-of-pocket repair.
This guide breaks the construction punch list process into six steps, from the prep work you do the week before through final sign-off and recordkeeping. It is written for the homeowner side of the table — the buyer who is taking delivery of a brand-new home and wants to know exactly what happens, when, and what to demand.
Step 1: Pre-Walkthrough Preparation
The week before the walkthrough is when the outcome is decided. According to NAHB's Residential Construction Performance Guidelines — the industry reference document used in many state warranty disputes — workmanship issues are evaluated against specific tolerance standards that most homeowners have never seen. Your job in the prep phase is to know what those standards are, gather your own paperwork, and assemble the right tools.
Pull out your signed construction contract, the architectural plans, and any change-order documentation. Read the warranty section so you know which timelines apply to what. Then organize your tools: a smartphone with battery to spare, a flashlight, an outlet tester, a roll of blue painters' tape, sticky notes, a tape measure, and your printed punch list template.
The table below maps the full construction punch list process at a glance — keep it open during prep.
| Step | Timeline | Documents to Have Ready | Homeowner Actions |
|---|---|---|---|
| 1. Pre-walkthrough prep | 7 days before | Contract, plans, warranty, change orders | Read warranty, gather tools, schedule inspector |
| 2. The walkthrough | 3-7 days before closing | Plans, punch list template, phone | Inspect room by room, photograph each defect |
| 3. Build the punch list | Same day as walkthrough | Signed punch list, photo log | Number every item, assign priority, get builder signature |
| 4. Builder remediation | 15-60 days post-walkthrough | Punch list copy, photo log | Track resolution, store before/after photos |
| 5. Final verification | 1-3 days before closing | Original list, completion photos | Re-inspect each item, mark verified-fixed |
| 6. Records preservation | Ongoing post-closing | Signed punch list, all photos, manuals | Archive permanently with property records |
Schedule the walkthrough for mid-morning if possible — natural light reveals defects that artificial lighting hides, and you want enough daylight to inspect exterior grading and roof flashing from the ground. If your contract allows an independent inspector, hire one. The typical cost ranges from roughly $300 to $425 according to Angi, which is trivial compared to what a missed defect will cost to repair after warranty coverage tightens.
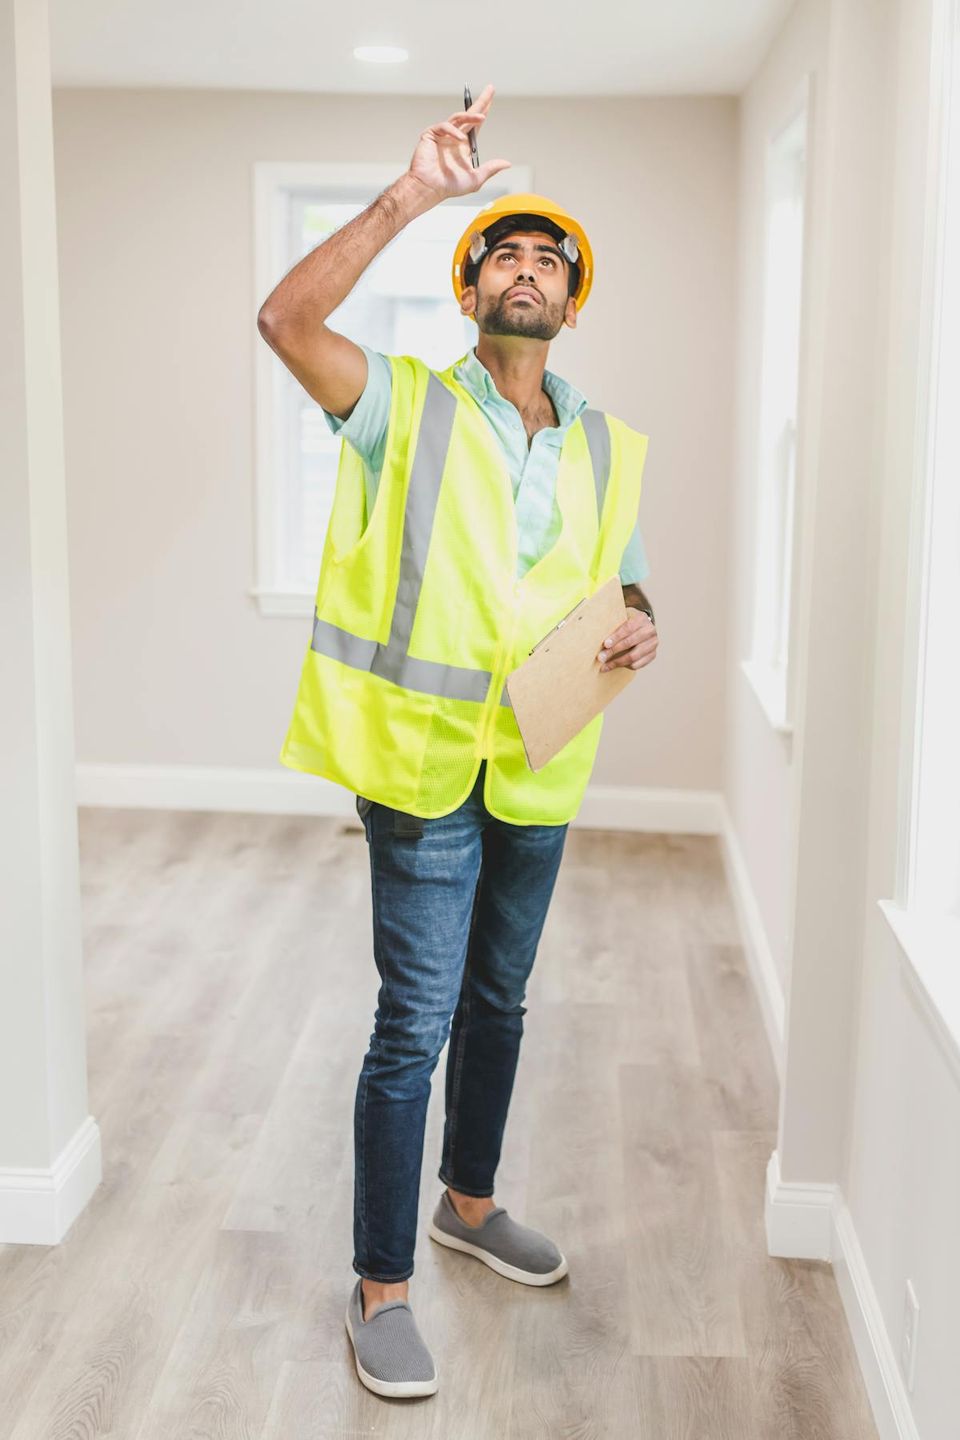
Step 2: The Walkthrough Itself
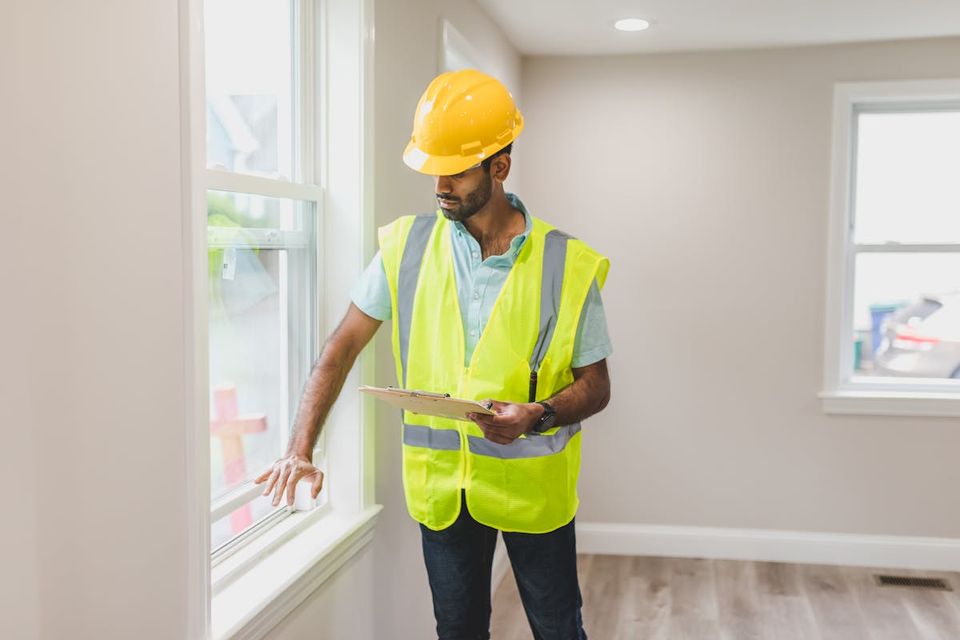
The new construction punch list walkthrough is the inspection event where you generate the list. According to Rocket Mortgage's guidance on the blue-tape walkthrough, buyers literally stick blue painters' tape on every defect they find so the builder can see at a glance what needs attention. Block at least three hours on your calendar, even if the builder estimates one.
Work room by room in a fixed order so you do not double back. A practical sequence is exterior first (while light is best), then garage, then interior starting from the main entry and moving clockwise through each floor. In each space, do the following:
- Operate everything. Open every door, every window, every cabinet, every drawer. Flush every toilet. Run every faucet. Turn on every light switch, GFCI, and outlet (with a tester). Confirm every appliance powers on.
- Photograph every defect at two distances. A wide shot showing the location in the room, then a close-up showing the specific issue. Date-stamp metadata is automatic on most phones.
- Mark with tape. Place a small piece of blue tape directly on or next to each defect. The builder uses this as a visual punch list during remediation.
- Note it in the template immediately. Do not trust yourself to remember 30 items later. Write each defect down with room, location, and description as you find it.
Use a flashlight inside cabinets, closets, the attic access, the crawl space if accessible, and behind toilets and tubs. The final walkthrough is your last best chance to catch construction defects before closing, and the issues that hurt most later — improperly sealed shower pans, missing flashing, miswired GFCI outlets — are usually invisible in good light.
If you brought an independent inspector, let them lead the systems portion (HVAC, electrical panel, plumbing supply lines, roof). Walk through the inspector's report with the builder representative at the end of the appointment so they cannot claim later that an item was raised after the walkthrough closed.
Step 3: Building the Punch List Document
By the end of the walkthrough you should have a working list — but a list of items is not yet a punch list. The punch list is a signed, dated document that obligates the builder. Spend 30 minutes at the end of the walkthrough turning your notes into that document.
For each item, capture seven fields:
- Sequential number — so nothing gets lost
- Room or area — kitchen, master bath, garage, exterior north elevation
- Specific location — "north wall, 4 feet from window"
- Defect description — clear enough that any tradesperson can identify the issue
- Priority — high (safety, code, or function), medium (warranty-impacting), low (cosmetic)
- Photo reference — file name or thumbnail
- Builder response and target completion date — filled in by the builder rep on the spot
Procore's construction industry reference describes a punch list as the formal record of work that does not conform to contract specifications, which the general contractor must correct prior to final payment. That phrase — "prior to final payment" — is your leverage. The punch list only works as a document if both parties sign it before you release the closing funds.
Before you leave the walkthrough, both you and the builder representative should sign and date the document. Keep one physical copy and at least one digital copy. Email a scanned version to yourself and to your closing attorney or title agent so a third party has it on file.
Step 4: Builder Remediation Timeline
Most contracts specify a remediation window — commonly 15 to 30 days for cosmetic items and longer for items that require subcontractor scheduling. Reasonable builders work the punch list aggressively because they want to close and collect final payment. Less reasonable builders need to be managed.
| Item Type | Typical Remediation Window | Verification Method |
|---|---|---|
| Cosmetic (paint, touch-ups, caulking) | 7-15 days | Visual inspection |
| Trim, drawer, door alignment | 7-21 days | Operate and inspect |
| Plumbing or electrical defects | 14-30 days | Function test + tester reading |
| Appliance replacement or repair | 21-45 days | Operate full cycle |
| Subcontractor work (tile, flooring, exterior) | 30-60 days | Re-inspect with original photos |
| Structural or code-related items | Before closing, no exceptions | Re-inspection + permit sign-off |
During the remediation window, do not visit the home unannounced — but do check in by email every five to seven business days for a written status update on each item. Save every email. If the builder marks items complete, request photos before you visit, so you arrive ready to verify rather than relying on the builder's word.
If items remain incomplete and the builder is pressuring you to close, push for an escrow holdback. Many states allow a portion of the final payment to be held in escrow until punch list items are verified complete. Your closing attorney can structure this if the builder will not delay closing.
Step 5: Final Walkthrough Verification
Schedule a second walkthrough — separate from the first — within one to three days of closing. This is not a courtesy visit. It is a structured verification that every punch list item has actually been resolved.
Bring your signed punch list, your original photo log, and your tape and tester from the first walkthrough. For each numbered item:
- Locate the original defect using your photo wide shot
- Verify the fix in person, not by report
- Photograph the corrected condition alongside the original defect photo so you have before-and-after pairs
- Mark "verified fixed" with your initials and the date
Items that are not actually fixed get re-listed, with a written escalation. If a builder claims an item is fixed and you find it is not, that is a documentation event — note the date you re-inspected, who told you it was complete, and what you found. This becomes part of your warranty evidence later.
Items that have been corrected get checked off and signed by both parties as completed. At the end of the second walkthrough, you should have a clean punch list with every item either signed-off as resolved or escalated to a written agreement about how it will be resolved post-closing.
Step 6: Keeping Records of Completion
The punch list does not stop being useful at closing. Every warranty claim you file over the next decade is strengthened by your punch list records — they prove what you accepted, what the builder corrected, and the baseline condition of the home. Lose the records and you lose the leverage.
Build a permanent file (digital is far better than paper) with these elements:
- The original signed punch list with every item, photo reference, and builder signature
- Walkthrough photos organized by punch list item number
- Builder correspondence on each item
- The final verification photos showing each item as resolved
- All warranty documents, manuals, and as-built drawings handed over at closing
- The certificate of occupancy and final inspection reports
Consider how Ed Oravetz handles the handoff at The Terraces Townhomes, the 60-unit Blue Ridge Mountains community he developed: every permit, inspection record, change order, walkthrough photo, and signed punch list is captured in a structured digital property ledger and transferred to the homeowner at closing. "Most builders hand you a house," Oravetz puts it. "We're handing homeowners the proof." That structured handoff is what every homeowner should be asking for — and what every buyer should preserve if their builder does not provide it.
For a broader view of every document that should come with your new home, our builder to homeowner documentation handoff guide covers the full set. For the construction-phase records the builder maintains and should transfer, see our new construction documentation checklist.
Common Mistakes Homeowners Make
The mistakes that cost the most money are the easiest to avoid. After watching hundreds of new construction handoffs go right and wrong, these are the patterns that consistently sabotage the homeowner punch list walkthrough:
- Rushing the appointment. A 15-minute walkthrough is not a punch list — it is a signature collection. Schedule three hours, and use them.
- Skipping the independent inspector. Saving $400 on inspection routinely costs thousands in undetected defects. The home inspector pays for themselves on the first finding.
- Inspecting in poor light. Evening walkthroughs hide paint flaws, surface defects, and exterior grading issues. Morning or midday only.
- Not photographing every item. Verbal agreements about cosmetic items dissolve into disputes within weeks. Photo every defect, every time.
- Signing the punch list without builder remediation deadlines. A punch list with no completion dates is a wish list. Demand specific dates per item before signing.
- Releasing final payment before re-inspection. Once the builder has the money, the urgency disappears. Hold leverage until verified complete.
- Losing the records after closing. The punch list matters for years. Store it the way you store your deed and title insurance — permanently, with backup, somewhere you will find it under stress.
A first-time buyer in Atlanta scheduled 90 minutes for her walkthrough, brought a single notepad, and signed off on a 12-item list before leaving. Eight months later, two of those items resurfaced — the master shower drain ran slow because the builder had used a fitting that did not match the spec, and a kitchen GFCI tripped under load. Neither was documented in the original photos because she had not taken any. The repair quotes totaled $1,850, and the builder's warranty department denied both claims citing insufficient evidence that the conditions existed at delivery. A second buyer in the same development took four hours, brought an inspector, photographed 34 items, and got every one corrected before closing — and her punch list file is still the document she pulls up when any warranty conversation starts.
What You Set at the Walkthrough Is What You Get for the Decade
The construction punch list process is the only structured leverage point you get with your builder. After closing day, every issue becomes a warranty conversation, a written request, a follow-up email, and sometimes a fight. Before closing day, every issue is a tape mark on a wall and a line on a list the builder has every contractual reason to fix. The homeowners who walk away from year one of new construction with the fewest headaches are not the ones who got lucky with their builder — they are the ones who walked the home for three hours, photographed every defect, and signed nothing until the list was clean.
Frequently Asked Questions
How long should a new construction punch list walkthrough take?
Plan for two to three hours minimum for an average single-family home, and longer for larger or custom builds. Most homeowners who feel rushed at closing schedule 15 to 30 minutes and miss the majority of defects. If the builder pushes back on the timeline, that is a signal to bring an independent inspector who can hold the schedule professionally on your behalf.
When in the construction process is the punch list created?
The punch list is created during the homeowner walkthrough, which typically happens once the project reaches roughly 95 to 98 percent completion — usually three to seven days before closing. Some builders also conduct an earlier pre-drywall walkthrough that produces a separate list of framing, electrical, and plumbing items before the walls are closed up.
What is the difference between a punch list and a final inspection?
A punch list is the running document of defects and incomplete work that the homeowner and builder generate together during the walkthrough. The final inspection is the verification step that happens after the builder has remediated those items, confirming each one is actually fixed before the homeowner signs off. Treat them as two separate appointments, not one combined event.
Can items be added to the punch list after closing?
Most builder contracts and limited warranties allow new items to be reported during a defined initial coverage window — commonly one year for workmanship and materials. The catch is that items missed at walkthrough may be harder to attribute to construction versus homeowner use. Document any post-closing defect with date-stamped photos as soon as you spot it, and report it in writing within the warranty deadline.
What should I bring to a homeowner punch list walkthrough?
Bring your signed contract and plans, a charged phone or camera, a flashlight, a roll of painters' tape or sticky notes, an outlet tester, a tape measure, and a printed or digital punch list template. Many homeowners also bring a second person to take notes while the first person inspects, and a licensed home inspector for a second professional opinion.
Keep Your Punch List Working After the Builder Drives Away
Real Estate Ledger gives every punch list item, photo, and builder sign-off a permanent home in your property record — searchable, fingerprinted via Digital Evidence, and ready to surface the day a warranty question comes up two years later. Upload your walkthrough photos, store every signed punch list page, and share the full record with your inspector or attorney in two clicks. Free for up to 10 properties, no credit card required.
Get started freeRelated Guides
What Is a Punch List? Definition, Process, and What It Means for New Construction Buyers
Punch list definition, where the term came from, and the step-by-step process from substantial completion to final walkthrough — for builders and new homeowners.
11 min readThe Complete New Construction Documentation Guide
Complete new construction documentation guide covering permits, inspections, warranties, and handoff packages. Learn builder documentation best practices.
6 min readBuilder to Homeowner Documentation Handoff: What to Expect and What to Demand
Learn what documents builders should hand off at closing, how to verify your new home documentation package, and protect your warranty coverage from day one.
6 min readProof of Ownership Documents for a House: What Every Homeowner Needs
Every proof of ownership document for a house: deed, title policy, mortgage, tax records, insurance, survey. What each one proves and when to use it.
7 min read